删除镜像:
docker image rm image_id
查看镜像列表:
docker images
安装docker、docker-compose
悟已往之不谏,知来者之可追
删除镜像:
docker image rm image_id
查看镜像列表:
docker images
安装docker、docker-compose
仿照 Kibana 的控制台工具做一款浏览器插件,方便日常工作使用,命名为:Kina
界面如下所示:
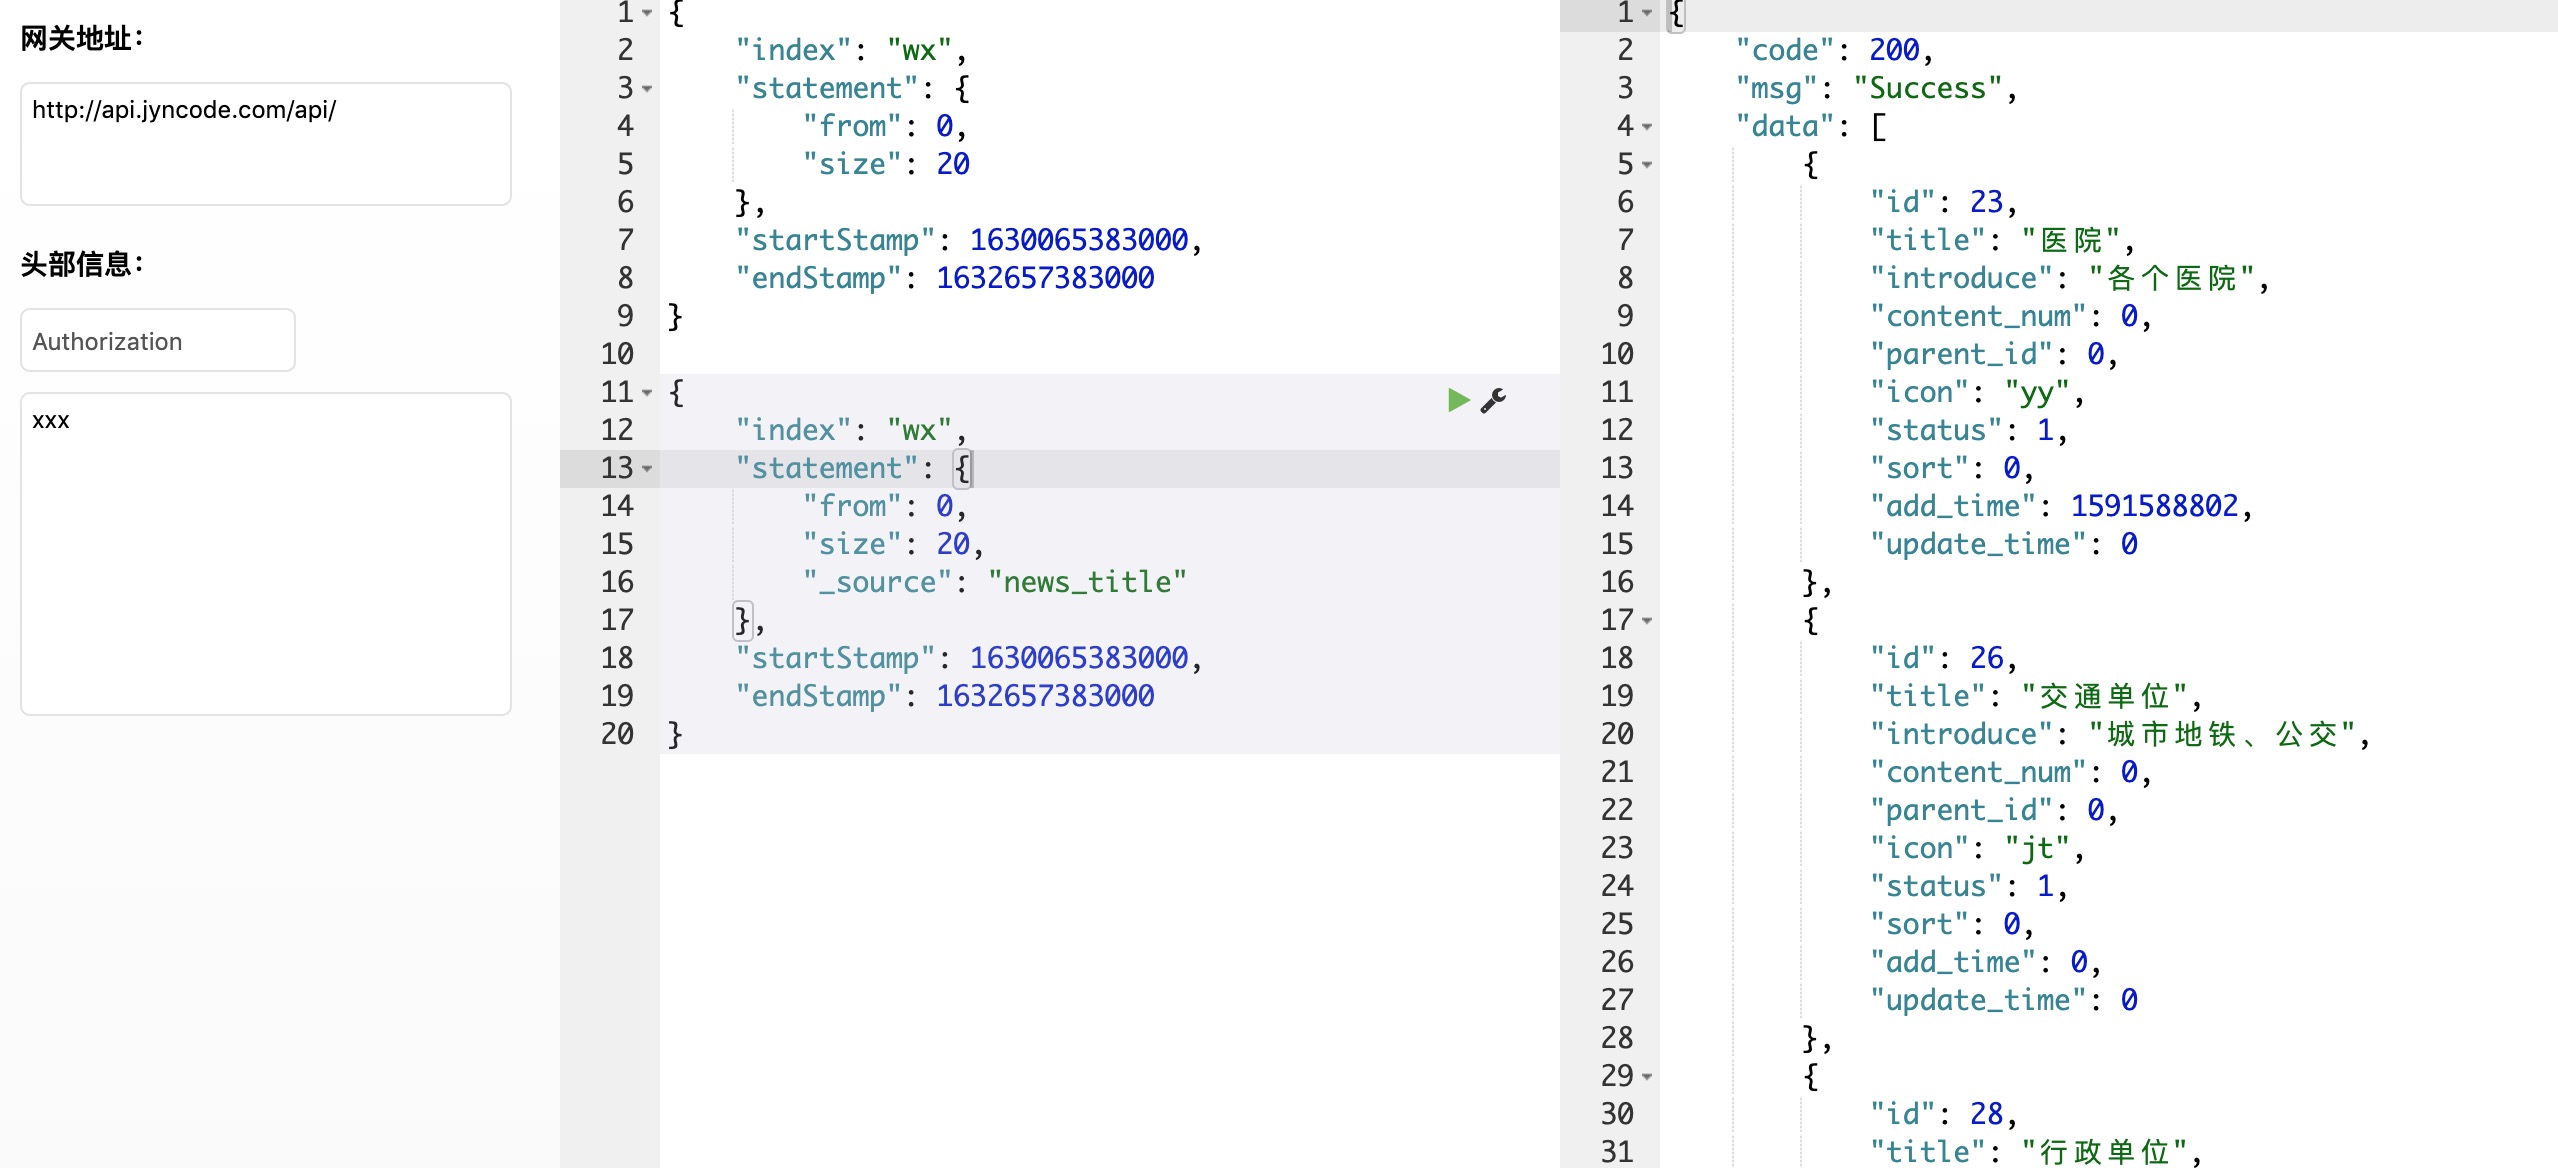
公司提供了 ES 网关进行查询服务,只要快捷获取 JSON 体再发送 XHR 请求就能获取查询数据,原理很简单。插件的难度主要集中在界面交互上,简单罗列下功能点,如下:
鼠标键入能快速定位当前 JSON 体、显示操作按钮(包括:执行、复制、格式化)
滚动条上下滑动,操作区能实时定位以保证在可视区域内
PHPOffice/PHPExcel官方已经不维护,推荐使用PHPOffice/PhpSpreadsheet
本文使用类库版本:1.10
Composer安装:composer require phpoffice/phpspreadsheet:^1.10
Excel2003版最大行数是65536行
Excel2007开始的版本最大行数是1048576行
Spring读取Properties文件
<context:property-placeholder location="classpath:db.properties"/>
我本地用的Spring-beans-5.2.3无法使用<context:property-placeholder/>属性,因为PropertyPlaceholderConfigurer已经被弃用,使用其他方式:
<bean id="propertyConfigurer"
class="org.springframework.beans.factory.config.PropertyPlaceholderConfigurer">
    <property name="locations" value="classpath:db.properties"></property>
    <property name="fileEncoding" value="utf-8"></property>
</bean>
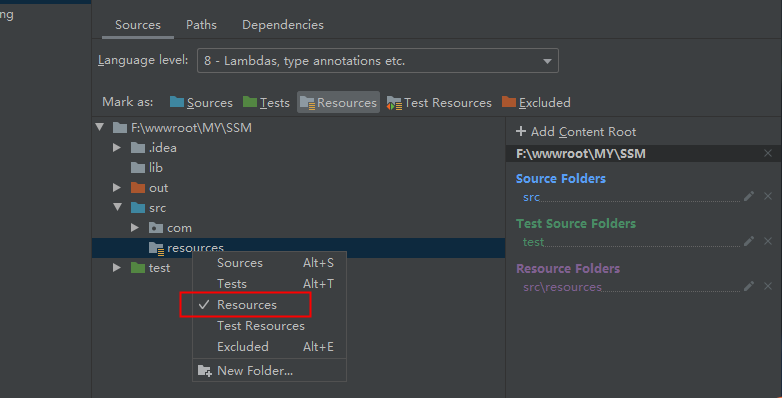
需要配置resources类路径
使用viewer插件选择器定位到img元素的父级,这样预览时可以左右切换查看同级图片
如果图片元素块包含其他操作,比如“设置封面”、“删除”等需要做下元素过滤
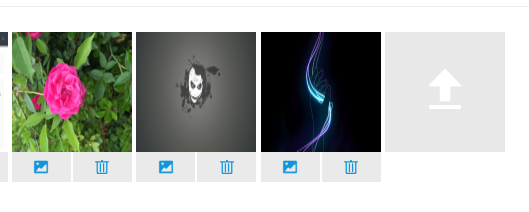
看下元素结构
<div class="img mb10" id="view_img">
    <a class="parent_img" href="javascript:;" target="_self">
        <img src="5e952486ca2a0.JPG" class="imgs" data-original="5e952486ca2a0.JPG" width="120" height="120" />
        <label class="act flex">
            <span><img class="cover" src="/static/images/cover.png" title="设置封面" data-type="1" /></span>
            <span><img class="del" src="/static/images/del.png" title="删除" data-type="2" /></span>
        </label>
    </a>
    <!-- 相同结构 -->
    **
    <a class="btn-file" href="javascript:;" target="_self">
        <label>
            <form method="post" enctype="multipart/form-data" id="change-thumb">
                <input type="file" name="upfile"/>
                <input type="hidden" name="id" value="1"/>
                <input type="hidden" name="action" value="uploadimage"/>
            </form>
        </label>
        <img src="/static/images/upload-arrow.png" width="120" height="120" class="upload"/>
    </a>
</div>
将cover、del元素过滤,追加元素时更新查看器实例,JS版本:
<script src="/static/viewer/js/viewer.min.js"></script>
<script>
var selector = document.getElementById('view_img'),
options = {
    url: 'data-original',
    toolbar: !0,
    navbar: !0,
    title: !0,
    minZoomRatio: 0.2,
    maxZoomRatio: 2,
    filter(selector) {
        // 选择器过滤
        return selector.className == 'imgs' ? true : false;
    }
};
var handle = new Viewer(selector, options);
$(".btn-file label").change(function () {
      // 追加元素
      /* Tips:将追加元素更新到查看器实例 */
      handle.update();
});
$('.img').on('click', '.cover,.del', function () {
    // 其他操作
})
jQuery版本
互联网创业总是不可避免要思考几个问题,该设计一款什么样的产品,以及如何在互联网浪潮中让这款产品脱颖而出?如何让产品获得持续的生命力?等等《上瘾》这本书或许给出答案
上瘾模型:触发、行动、多变的筹赏、投入
触发:引导用户使用产品
分为内部触发和外部触发
外部触发通过将信息渗透到用户生活的各个方面去引导他们使用。
外部触发又可以细分:
付费型:花钱买广告,付费营销
回馈型:媒体报道、热点事件带来的短期流量效应
Golang的基础语法基本学完了,准备搞个项目练练手,试着用下beego框架,安装出现如下问题
[root@localhost /]# vi /etc/profile

# 关于go的基本配置
export GOROOT=/usr/local/go
export GOBIN=$GOROOT/bin
export GOPATH=/mnt/hgfs/www/GoCode/
export PATH=$PATH:$GOBIN:/usr/local/php/bin/pecl:/usr/local/mongodb/bin

[root@localhost /]# go get github.com/astaxie/beego
# cd .; git clone https://github.com/astaxie/beego
/mnt/hgfs/www/GoCode/src/github.com/astaxie/beego
Initialized empty Git repository in
/mnt/hgfs/www/GoCode/src/github.com/astaxie/beego/.git/
error:  while accessing https://github.com/astaxie/beego/info/refs

fatal: HTTP request failed
package github.com/astaxie/beego: exit status 128
关于这个问题,网上一直搜不到非常好的解决办法,甚至有人直接下载源码安装,非常不优雅
既然https用不了,改成ssh协议应该没问题,试下
[root@localhost /]# git clone git@github.com:astaxie/beego /mnt/hgfs/www/GoCode/src/github.com/astaxie/beego
Initialized empty Git repository in /mnt/hgfs/www/GoCode/src/github.com/astaxie/beego/.git/
The authenticity of host 'github.com (52.74.223.119)' can't be established.
RSA key fingerprint is 16:27:ac:a5:76:28:2d:36:63:1b:56:4d:eb:df:a6:48.
Are you sure you want to continue connecting (yes/no)? y
Please type 'yes' or 'no': yes
Warning: Permanently added 'github.com,52.74.223.119' (RSA) to the list of known hosts.
Permission denied (publickey).
fatal: The remote end hung up unexpectedly
按下面方法来解决,先生成一个ssh key,将其添加到github账号ssh-key-lists里面,git config的其他设置不具体说了
[root@localhost ~]#  ssh-keygen -t rsa

[root@localhost ~]#  vi /root/.ssh/id_rsa.pub
再试下安装,ok,同理安装 bee 工具
公司的项目使用http合并请求,本地环境一直没配,导致自动化发布的时候很不方便,抽点时间把nginx更换成tengine,记录下,过程很简单
上传和下载
Linux小白看过来,我们先学习下简单易用的上传/下载命令rz和sz,我们可以通过 yum install lrzsz 进行安装
上传(rz) --- receive 指服务器从本地接收
可以使用 rz -y 实现覆盖上传,上传窗口的默认目录可以在SSH客户端里进行设置
安装完成,写入PATH路径,设定数据库位置
[root@localhost]# mkdir -p /data/db
试着来启动一下,无返回
[root@localhost etc]# cd /usr/local/mongodb/bin/
[root@localhost bin]# ./mongod
2017-07-28T10:31:59.655+0800 I NETWORK [thread1] **
2017-07-28T10:31:59.655+0800 I NETWORK [thread1] waiting for connections on port 27017
启动失败自然也就连接不上了,网上有很多人遇到相同问题,梳理下解决方法
通过命令行启动
//创建Log路径
[root@localhost]# mkdir -p /usr/local/mongodb/data/
[root@localhost]# touch mongodb.log

//创建Conf文件
[root@localhost etc]# vi mongo.conf
//conf内容
auth=true

//检查端口是否被占用
[root@localhost etc]# lsof -i :27017

//cd到bin路径下,命令行启动
[root@localhost etc]# ./mongod --dbpath /data/db
--logpath /usr/local/mongodb/data/mongodb.log
--config /etc/mongo.conf --fork

//连接
[root@localhost bin]# ./mongo
MongoDB shell version v3.4.6
connecting to: mongodb://127.0.0.1:27017
MongoDB server version: 3.4.6
>
通过配置文件启动
Go的安装很简单,做几步配置就可以了,做个记录方便以后重装。
官网下载
http://www.golangtc.com/download
找到对应版本,我的电脑是64位的,如果你是mac小白,用uname -a 查下系统版本。
下载go1.8.darwin-amd64.pkg,推荐通过安装包来装,有兴趣的朋友可以折腾下源码安装,相对来说,难度要大点。